Wednesday 31 August 2011

Little Apples Baby Quilt complete!


 Thankyou for all the suggestions for quilting the Little Apples quilt I've made for my friend's new baby. I went with Jessica's suggestion and did wavy lines. I really really like how it's turned out!


I hope my friend does too :)


This is one of the quickest and simplest quilts I've ever made. For those interested I used a charm pack of Little Apples by Aneela Hoey for Moda, mixed in with a couple of leftover  'It's a Hoot' Charms by Momo. The sashing is 2.5" strips of Klona in white, and the backing is a Katie Jump Rope print that I love using for quilt backs, with a scrappy strip pieced in. The binding is a bit of a red sheet from ikea that I had leftover from backing another quilt. After washing and drying it ended up at approx 40" x 46"

Fiona x

Sunday 28 August 2011

Ugly? - Part 1


A while back the lovely Susan of Canadian Abroad was looking for a new home for some fabric that was 'ugly' She was happy to send it to a new home knowing that someone else might use it. I honestly didn't think the fabric was ugly. A bit muted, floral and old-fashioned perhaps, the sort of thing my Granny might favour, but definitely not ugly. I told her I would use it to make a charity quilt.When the fabric arrived I couldn't believe how much she had sent me, and I actually really liked one of the prints. I'd had an idea brewing in my head for a sweet baby quilt and thought these fabrics might be perfect.

Last night I sketched out a quick idea and this morning persuaded my daughter Hannah that she might like to help me make something for charity. She was all for it and got straight to work.


I showed her my sketch and explained my idea and she totally went for it, and laid all the bits out, just the way I'd pictured.


I've already fused the uglies to the white (whilst ironing the school uniforms) and while I was doing that Hannah was worrying that there might be a little boy that needed a quilt too. With only the tiniest bit of help she has designed a quilt, and chosen the fabric she thinks would be best. I've promised her I'll make a quilt for a little boy using her design and fabric choices.


Isn't it great what can come from ugly fabric :)

Thankyou Susan x

Friday 26 August 2011

Last of the Summer Sampler blocks


I feel a tinge of sadness that the blocks are finished because I have LOVED this QAL. It's the first time I've tried paper-piecing, first time I have just dived into my fabric stash and pulled fabrics depending on what I like and how I think they look together, and the first time I've loved every block I've made while doing a QAL!


Above are all my blocks together. The photo is a bit gloomy because it's raining outside but I snapped it anyway because I am so excited to be finished :)

Below is my favourite block. It's called Evening Star, and the tutorial for it is here.


Thankyou so much to Katie - Swim, Bike, Quilt,  Faith - Fresh Lemons Quilts and Lee - Freshly Pieced I have learned so much doing these blocks. Now it's onto sashing. I'm planning white sashing with different coloured corner-stones. I had thought of maybe making tiny 9-patches for the corner-stones but I don't know if that's overkill. I'll grab a cup of tea and think about that :)

You can see some of the amazing quilts that are already finished in the Flickr Group 

Have a great weekend!
Fiona x

Monday 22 August 2011

Little Apples Baby Quilt and more QALs

First of all thankyou so much for all your kind words about my sandwich wrap tutorial last week! They were a great hit with my kids. Apparently they both used the wraps like little picnic blankets and spread their lunch out like a little picnic - sweet!


A school-friend of mine has just had a baby boy. I had always planned to make a quilt for the baby, and knew in the back of my head her baby was due at the end of August.
Suddenly the baby is here and I hadn't given much thought to the quilt!
After a bit of a panic, I grabbed a Little Apples charm pack I treated myself to, and whipped up this super quick and simple baby quilt top. I wanted all the squares to be colourful so I switched the mainly white squares with some leftover It's a Hoot by Momo charms.

I added those white squares to the back, along with some It's a Hoot by Momo and little scraps of Denyse Schmidt.
The green stripe is from Katie Jump Rope by Denyse Schmidt. I got this on sale and love using it for quilt backs :)

I would really appreciate soem advice on how to quilt it. I'm still a total novice at free-motion quilting but was thinking about trying a meandering pattern to soften all those squares, what do you think?
I'm tempted to go with what I know and just straight line quilt it, but if I don't practice FMQ I'll never learn.


I'm still behind but in the Summer Sampler Series QAL but I'm getting there. I really love these blocks, and I've learned so much so far.
I'm still not sold on paper-piecing, I just can't cope with the amount of wasted fabric, but I'm really glad I gave it a go. I love the sharp accuracy you get. I managed to use a lot of the odd shaped and little strips in the string block though, so I'm happy. Only 2 blocks to go :)


And finally I've fallen off the wagon again and joined another QAL. I just couldn't resit the Across the Sea QAL hosted by Sarah of Fairy Face Designs and Jennifer of Ellison Lane Quilts
I've chosen Joel Dewberry's Heirloom line, which I got from the lovely Brenda at Pink Castle Fabrics and I've popped a couple of solids in too. The grey on the left is my choice for background. I'm really excited about this QAL. I think it's going to be a cozy quilt the lives on my sofa. I can just picture myself snuggled up on a chilly evening, with a glass of wine in my hand and the dog snoozing on my feet :)
Hope you have a great week!
Fiona x

Tuesday 16 August 2011

Back to school sandwich wrap - a tutorial


Let me start by saying that I have never written a tutorial before so you may not want to read any further!

Towards the end of last term, my 2 older children told me that their school was trying to reduce waste and could they please take lunchtime drink in re-usable bottles rather than cartons that get thrown away. I thought this was a great idea and promised them that I would make them some sandwich wraps that could be re-used too.

Fast forward 8 weeks and school starts again tommorrow.....

"so did you make our sandwich wraps Mum?".........
"Errrr no not yet, errr, don't worry, I'll do them today!"

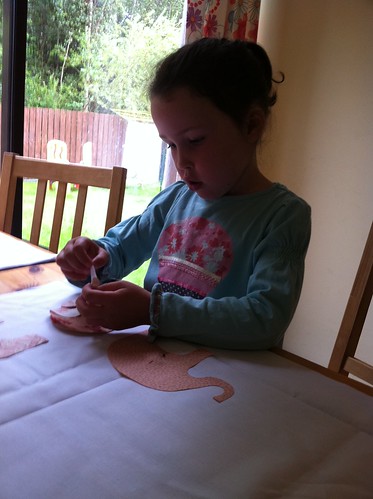
So armed with my mobile phone to take some pictures I set to work...
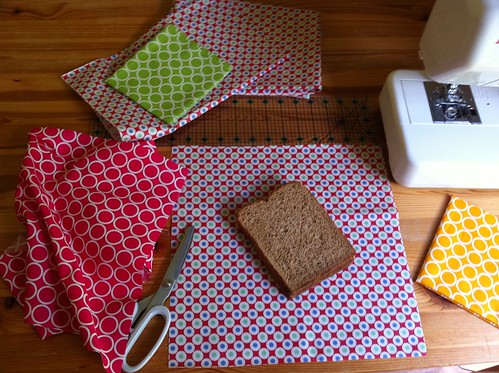

You will need:
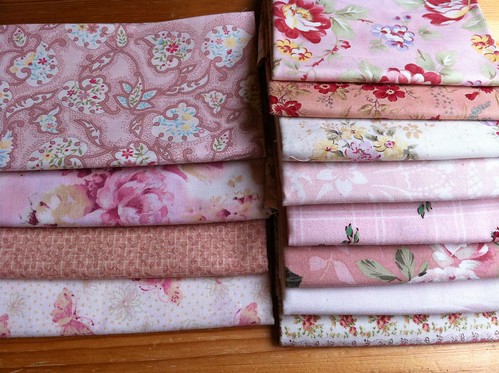
approx 13" square of laminated fabric for the inside of the wrapper
approx 13" cotton fabric for the outside of the wrapper
A closure of some kind. I had planned to use velcro but I couldn't find it I decided a button would be pretty. You could also attach some ties and just tie it closed.

* Edited *   If you are using pins please make sure that you only place them in the seam allowance. Once you remove the pins, the pin-holes are always visible in laminated fabric!


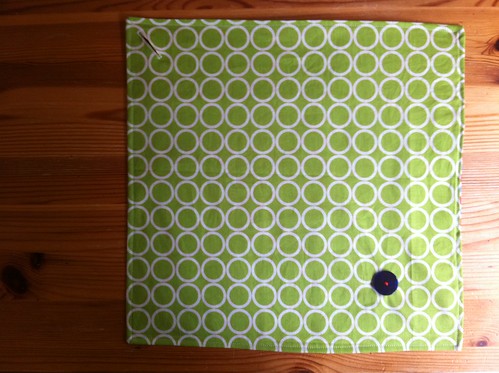
To decide what size to make it I grabbed a couple of slices of bread and guessed, I cut my laminate fabric and cotton fabric to 13" x 13" and it seems to be the perfect size :)

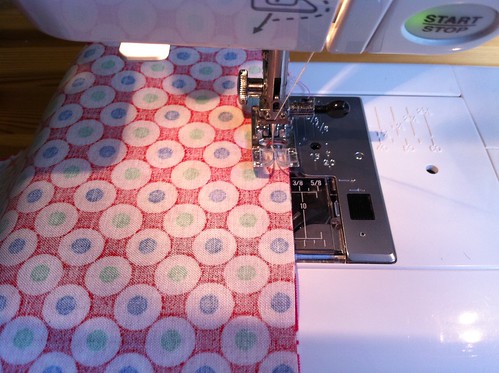
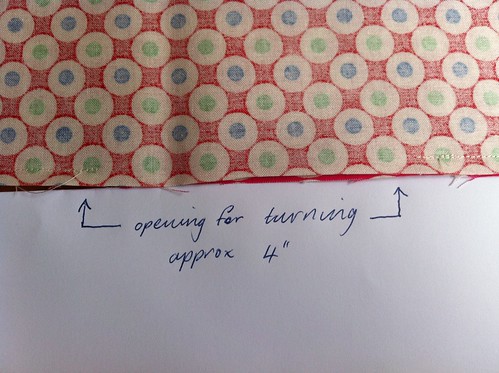
Place the 2 squares right sides together and sew a 1/4" around the edge leaving a 4" gap for turning.

Snip off the corners to reduce bulk


Turn right side out and poke the corners out using a chopstick or something pointy but blunt.

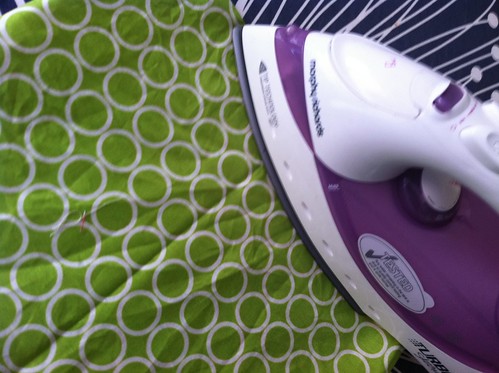
Make sure your iron is on a cool setting, and iron the cotton side only (do not iron the laminate side, it might melt!)


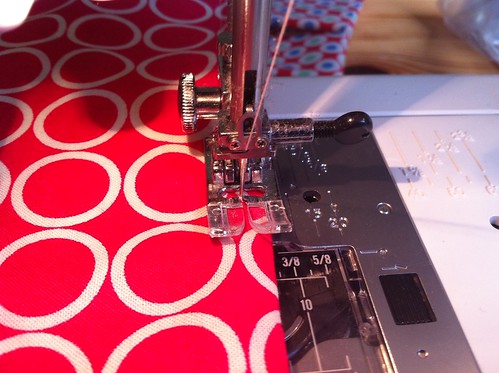
Top stitch approx 1/8" around the edge of the wrapper to keep it stable and seal the opening.


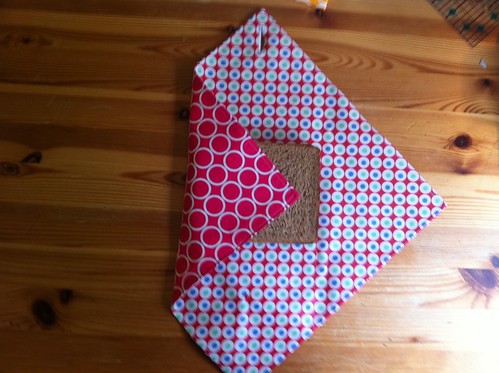
To make the wrapper you fold the corners in, as shown below.


I sewed a button-hole at one corner, and then folded it to decide the best place for the button. I decided the button was good approx 3 1/2" in from the corner.


If you were to use ties you could just attach ribbon to the corner and you would be done.

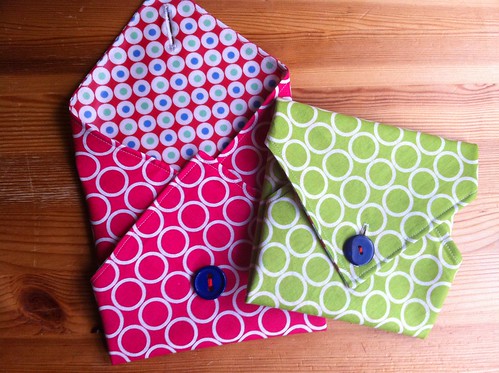
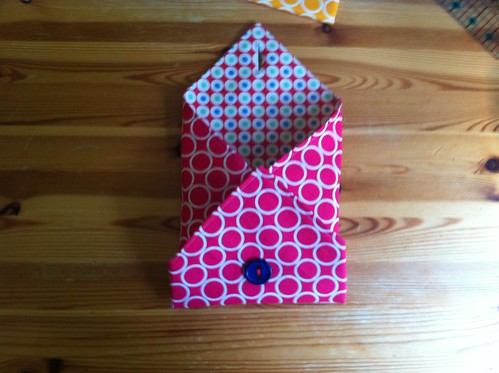
Sew on the button and Voila! You are done!


These can just be washed along with the dishes at the end of the day and will dry quickly because they are just 2 layers of fabric.

Ready to be used again and again.....

It took me about 45 minutes to make these 2 wrappers, but that included a quick hunt for some velcro, and reading the manual for my new sewing machine because I've never done a button-hole on it before! I think the second one took about 10 minutes, so quick and easy, and Eco-friendly :)

If you have any questions, or comments please get in touch. I've never written a tutorial before so would love to hear your feedback :)

Monday 15 August 2011

Holidays :)

I'm back after a lovely week away on the beautiful Island of Arran, off the West coast of Scotland.

We had a really nice relaxing time. There was torrential rain, sun, wind and lots of fun. We took the kids bikes, Connect 4 game, and several books and DVDs. The children's highlight was playing Crazy Golf with Dad :)


I took some sewing with me and was able to sit and stitch whilst enjoying this lovely view from the sofa (and a wee glass of wine or 2).


My hexagons are coming along nicely :)

And I'm still working on handquilting my Heather Ross Dresden quilt the I made during Lynne's QAL


I asked my 4 year old if he enjoyed his holiday - he gave me the thumbs up, but forgot the thumb! :)


I always love getting back home again, but it's all a bit frantic now. Our schools start back on Wednesday! I've just hung out the 6th load of washing from the holiday and I have a bazillion labels to attach to various items of school uniform!


Hope you have a good week!
Fiona x

Tuesday 9 August 2011

My new Apron!

Apron! by fionapoppy
Apron!, a photo by fionapoppy on Flickr.
I was lucky enough to win a giveaway from the lovely Reene and Yvonne at Nellies Nicities :)

I got to choose which item I would like Renee to make especially for me! It was a really hard choice because all the items in her mosaic were so beautiful but I chose a reversible apron to wear while I am sewing.

Image from Nellies Nicities :)

She whipped up this lovely apron for me and it arrived yesterday :) 


Today my 7 year old took these not-so-flattering pictures of me wearing it (please concentrate on the apron, and not my shiny face, floppy hair, double chin or stupid pose!)

Thankyou so much Reene and Yvonne! I love it! x

Friday 5 August 2011

Elliot's Quilt

I recently bought a fantastic scrap pack from the lovely Kelly at KelbySews. It was the triangle offcuts from this gorgeous quilt

She very kindly included all the white triangle offcuts too and a few days ago I went mad and chain pieced them all into HSTs with no plan of what they were actually going to become.

Sometimes I love mindless sewing just because I want to sew something, and I always love playing with other people's scraps (and Kelly's scraps smell lovely - I must find out how she gets her fabric to smell so nice!)

After making all these little 2.5" HSTs, it struck me they would be perfect to become a baby quilt for my baby nephew, so after playing with the layout, and a marathon piecing and quilting session (my children were staying with their Granny for a few days) those HSTs now look like this.


 And my new Nephew Elliot finally has his quilt :)

 Happy Friday! :)

Wednesday 3 August 2011

Doll Quilt Swap 11 Finished!

So here is my finished Doll Quilt for the DQS 11.
After a fair bit of stalking I tried to choose fabrics and colours my partner liked that I already had in my stash. I love using solids with prints and was able to find more saturated solid (or shot cotton) that co-ordinated with each print.

The blocks is called 'Night Vision' and each block is 6" finished. I really love this block, and will definitely use it again. I kind of wish I'd tried the smaller version - 3" finished but I just wasn't brave enough :)
After a lot of deliberation I decided to bind it in the same Kona bleached white as the background fabric so the blocks stand out.

Finished size is 18 1/2". I was going to wash it in the hope that it would shrink 1/2" to fit the size requirements of the swap, but I think I'll leave it to my partner to decide if she wants to wash it.

So there we have it, my first time in the DQS. I really really enjoyed maqking this little mini quilt. Just hope my partner likes it :)

Happy Wednesday and thanks for visiting :)