
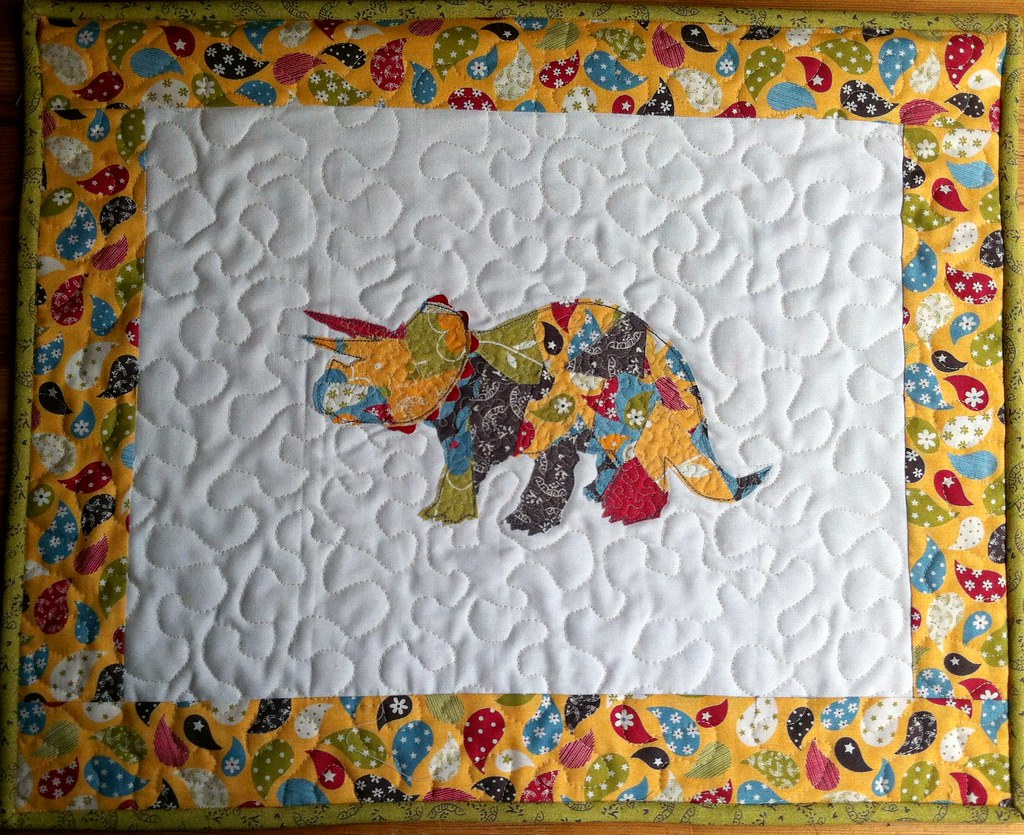
While I was thinking of designs to make for a modern mini, I stumbled upon this happy scene in my son's bedroom and it just made me smile. My youngest son has a severe case of dinosaur-itis. We call him 'Dino-boy'
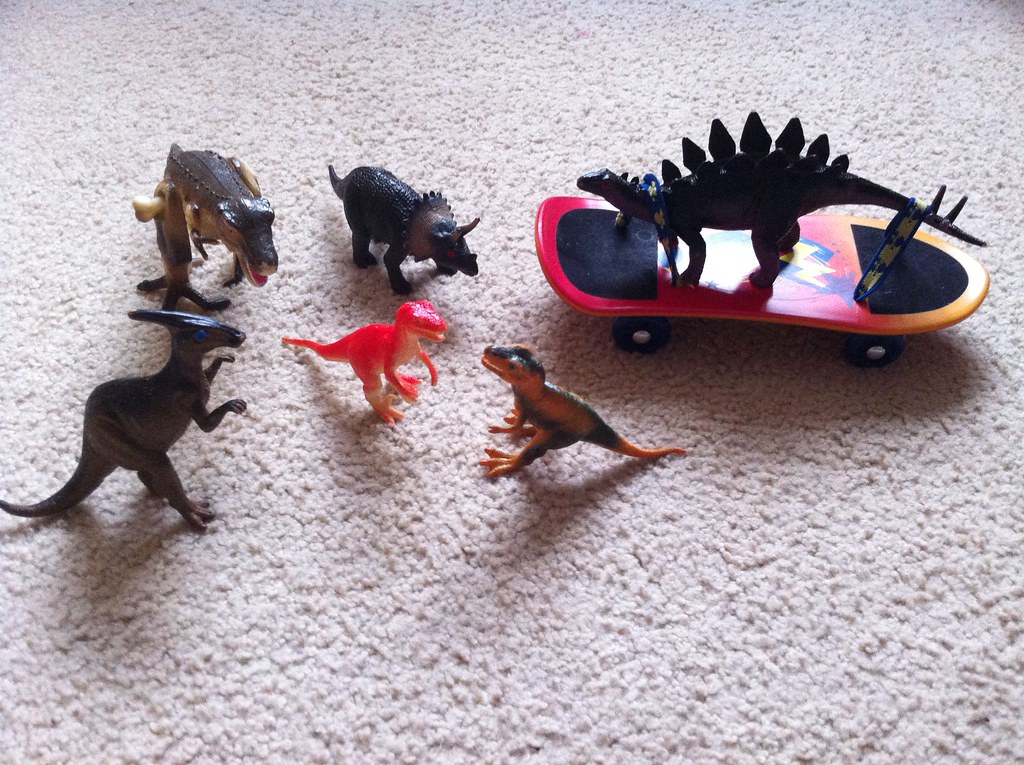
A large part of my day is spent marveling at the amazingness of dinosaurs with him and it seemed best to just embrace the dinosaur-itis for now and make him a mini quilt :) RAAAAAAAH!!!!!!!
This quilt is really easy to make, and there's a wee tutorial below if your interested in making something similar. Obviously you don't have to make a dinosaur!
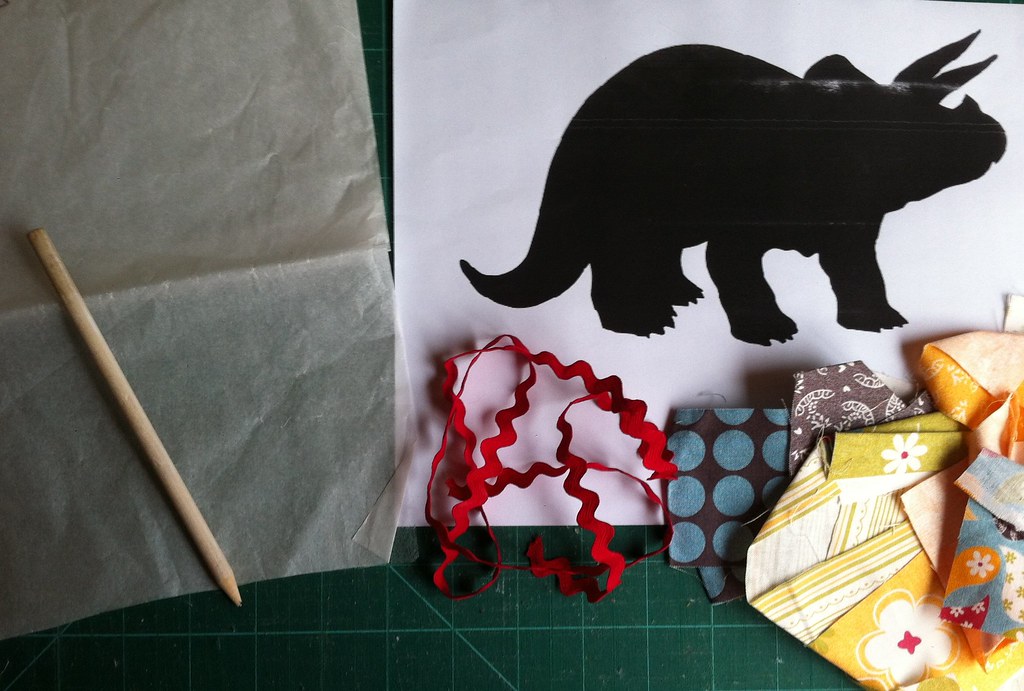
To make it you will need a few supplies:
- A shape. I googled 'Triceratops shape' and found this great silhouette which I printed out, but you could use any shape you fancy, you could just draw your own picture if you want.
- Some bondaweb / wunder-under / vliesofix or similar
- A pencil
- short length of ric rac
- some little scraps of fabric (I used some of the little scraps I saved from making my son's quilt)
- Some pins, scissors, an iron, some backing fabric, border fabric (I used 2.5" strips), wadding, backing and binding
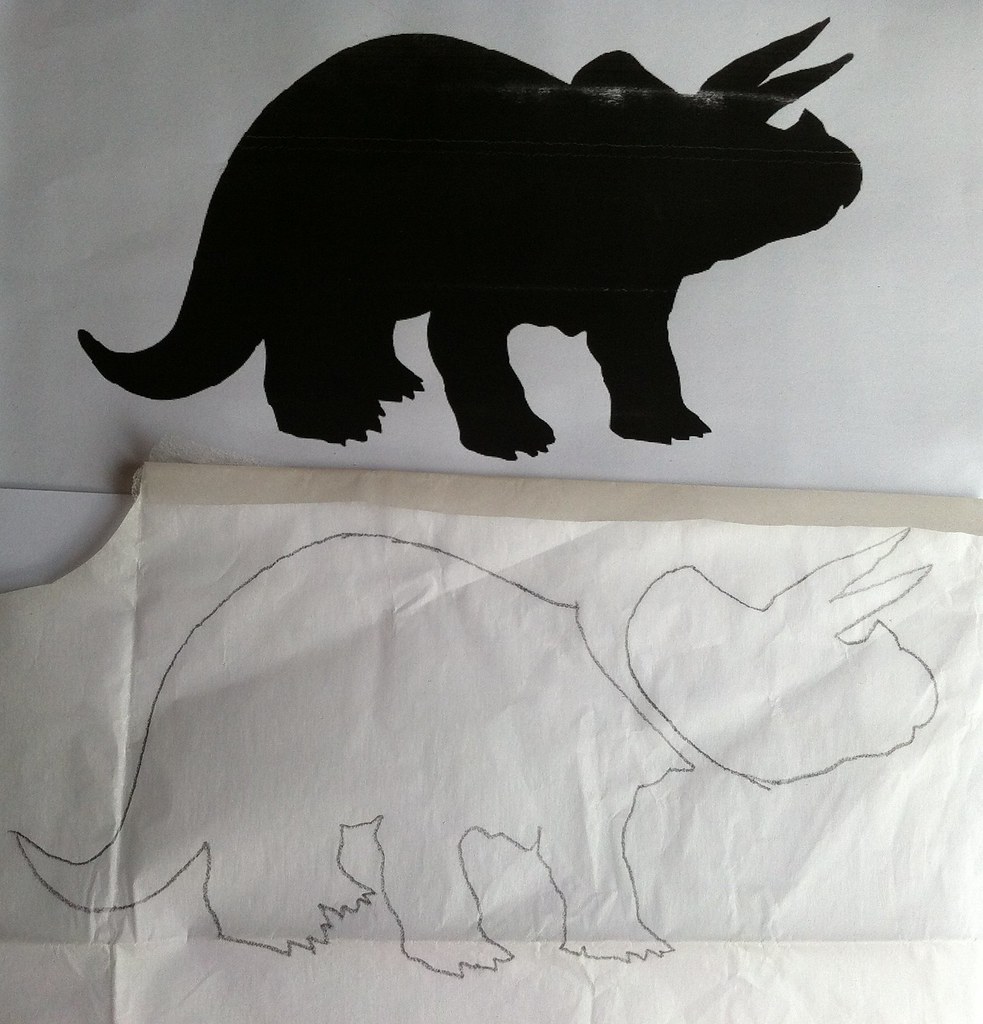
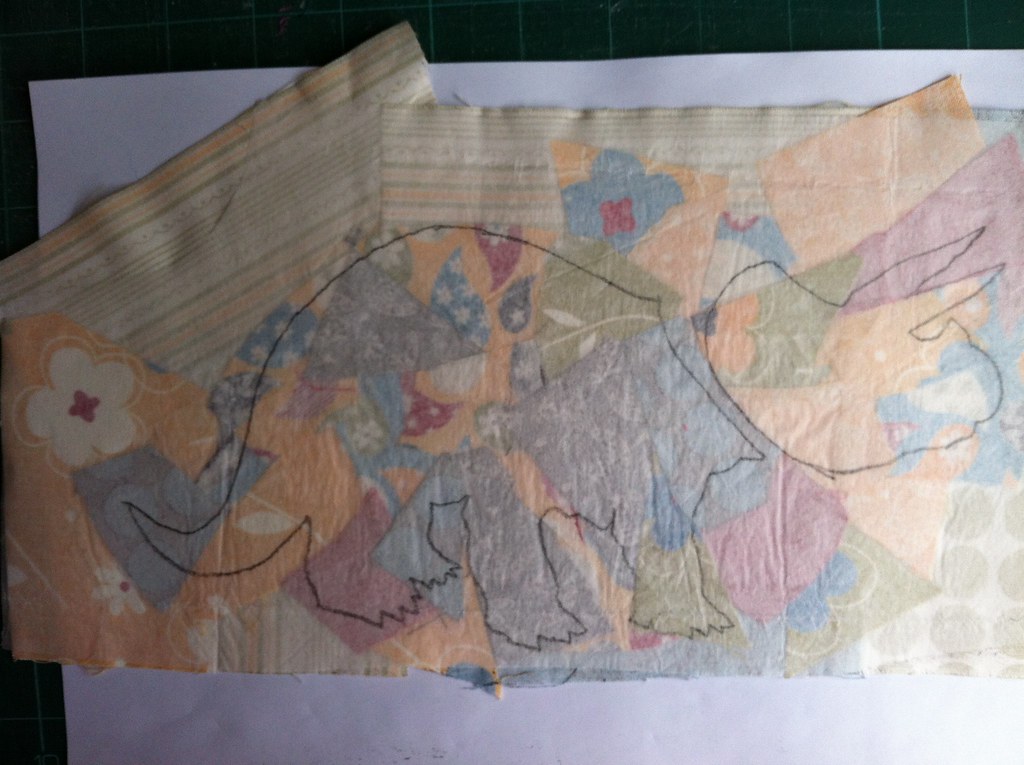
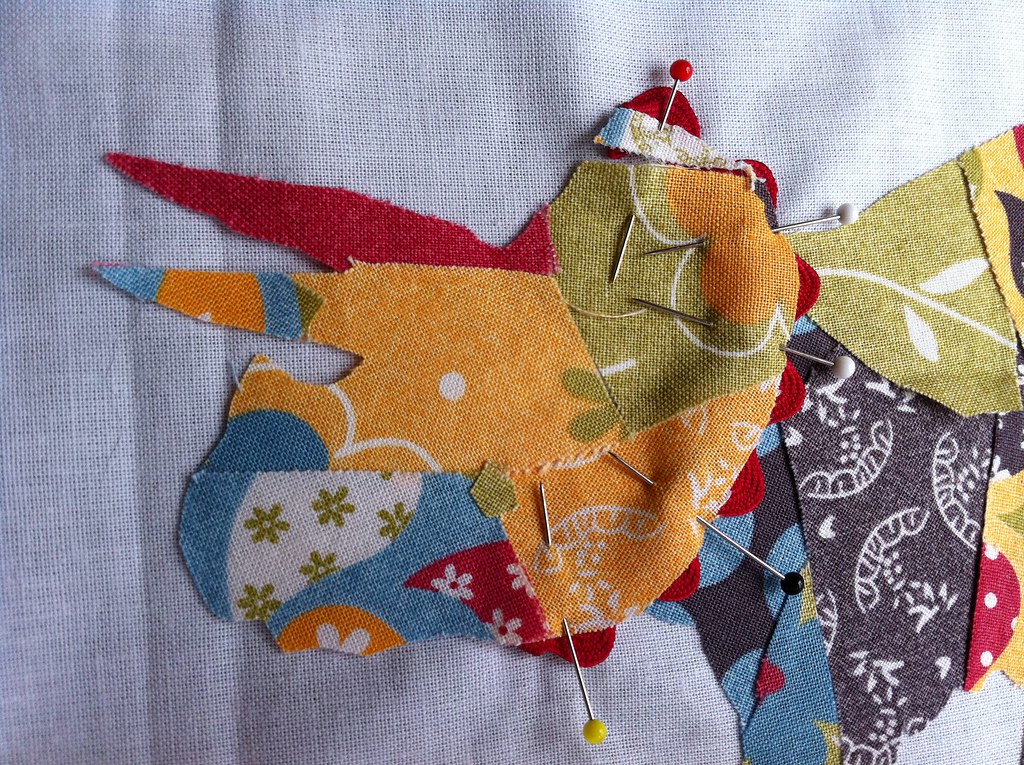
Start by drawing around your chosen shape on the paper-side of your Bondaweb (remember this will be the mirror image of the finished shape). I decided to keep the head and body 2 separate pieces, so I could use some ric rac to emphasise the triceratops' frilly-hood-thing.

Turn it over and start covering the whole of the sticky side of the shape in your little scraps. I chopped mine up quite small, but you could just use one piece of fabric to cover the whole thing if you'd prefer.

I wanted the head to be quite distinct from the body so I chose contrasting colours for where the head and body meet.
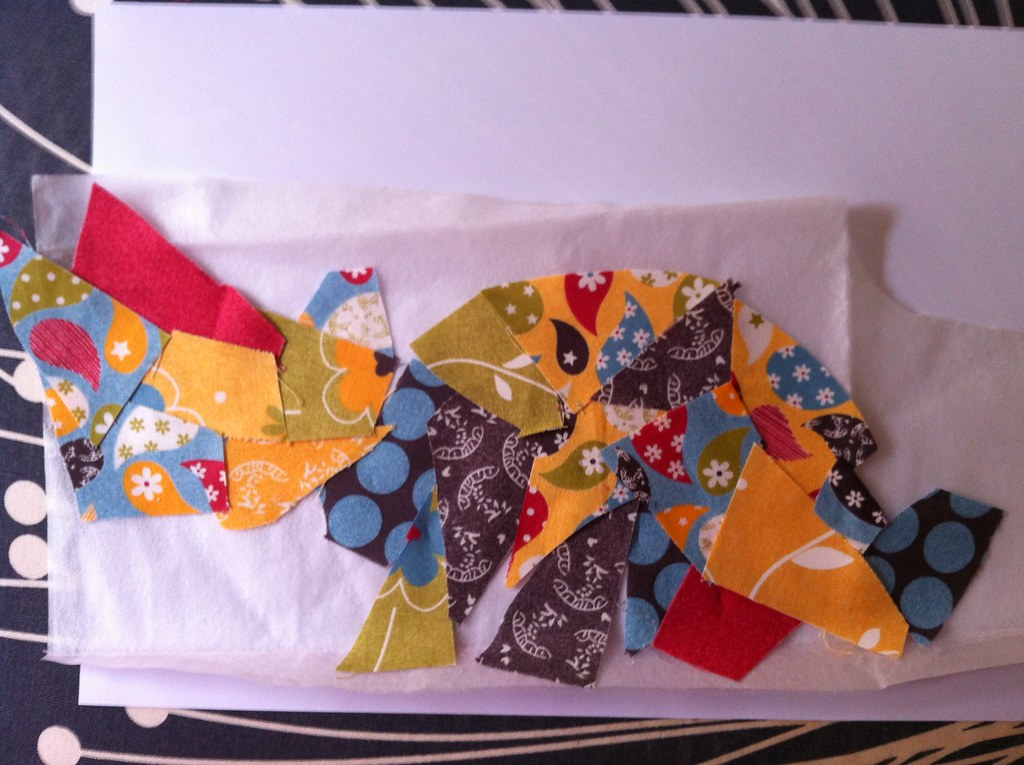
I found it useful to slip a white sheet of paper underneath so it was easy to see any areas I'd missed.
I gently touched each scrap with the tip of my iron as I went to stop them moving around.
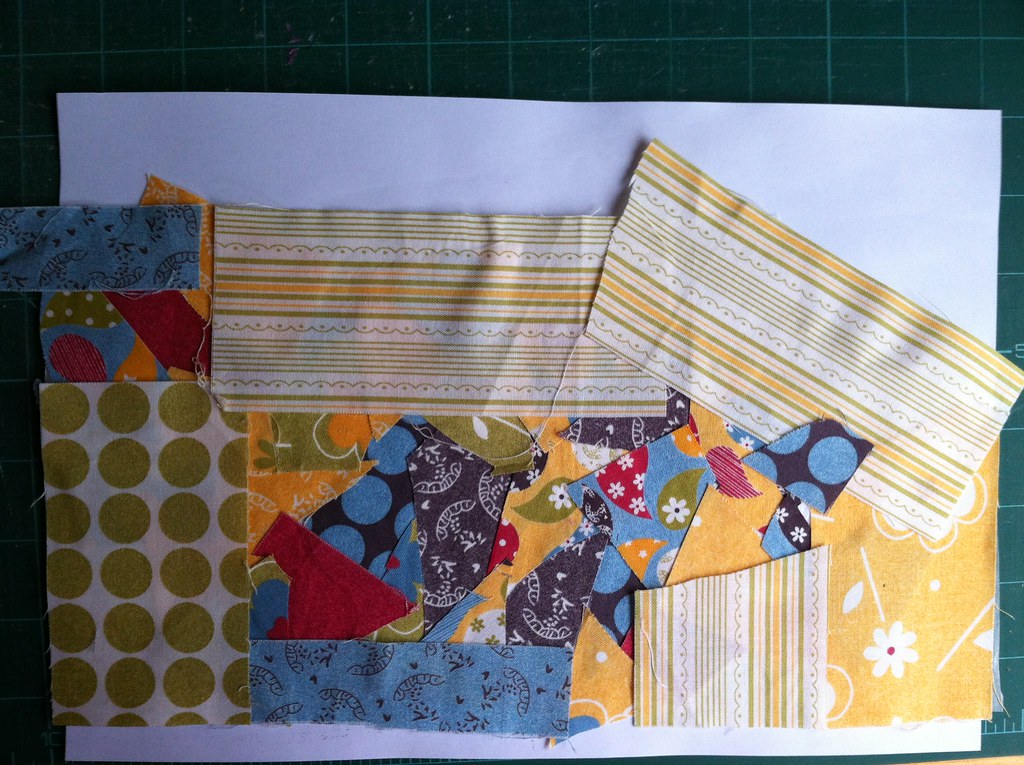
Once all the shape was covered, I used larger scraps to make sure ALL the sticky side of the Bondaweb was covered to protect my iron, and I left the paper underneath to protect my ironing board.
Then press to fuse all the fabric to the Bondaweb, following the fusing instructions of whatever product you are using.
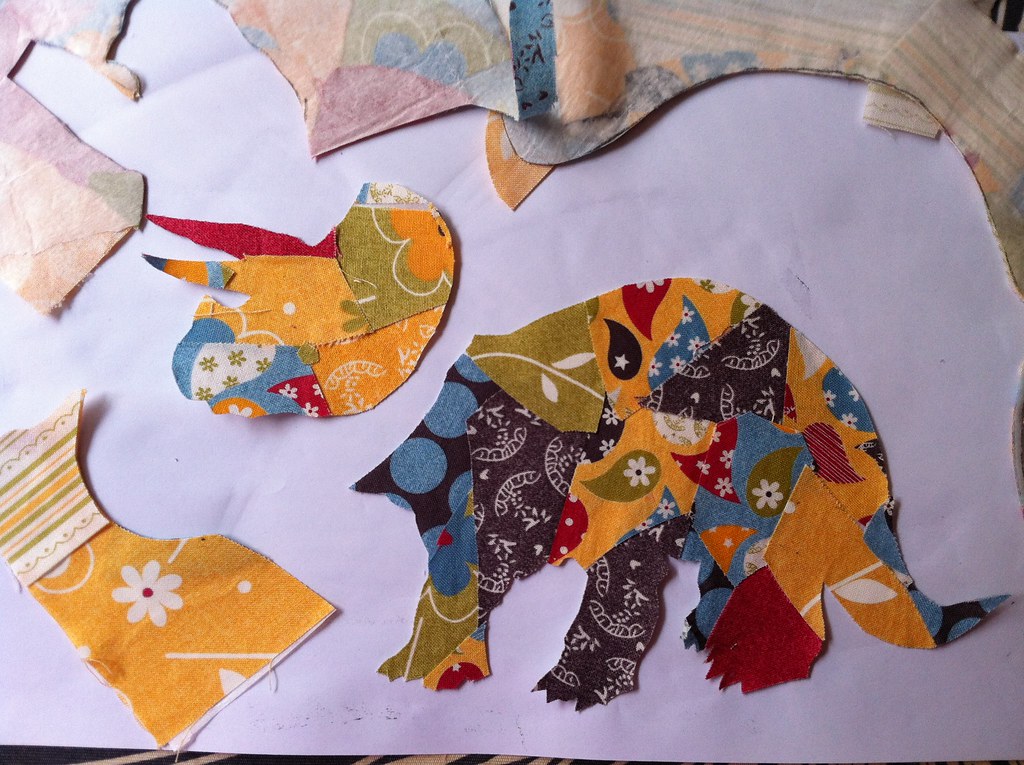
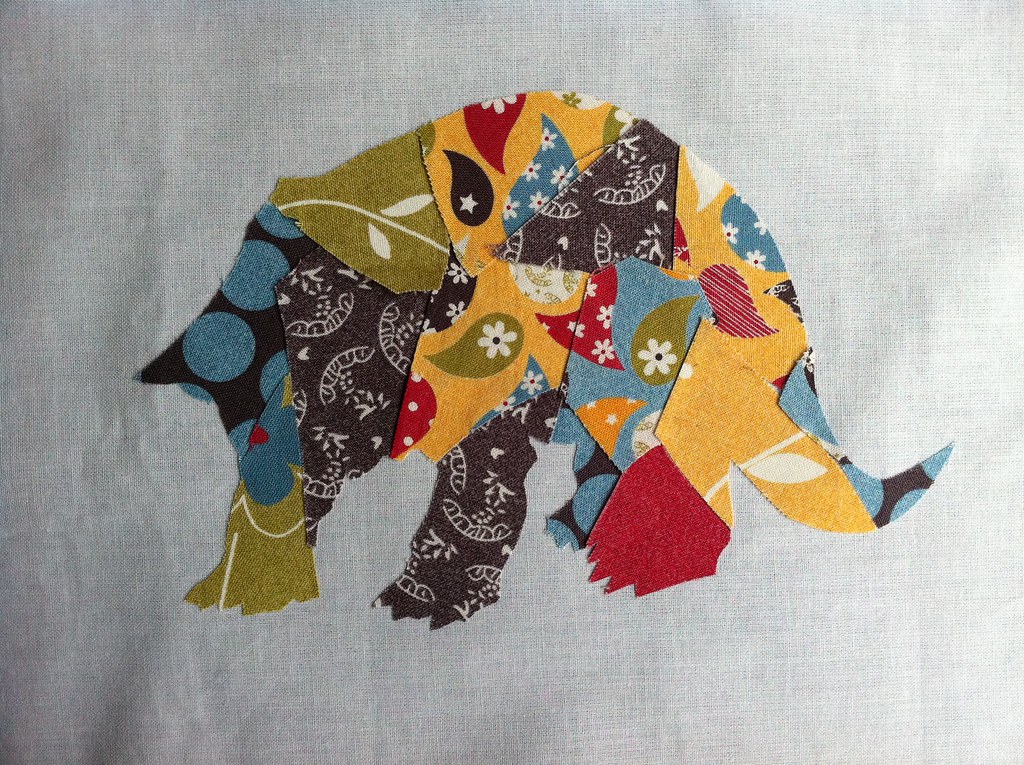
Cut out your shape
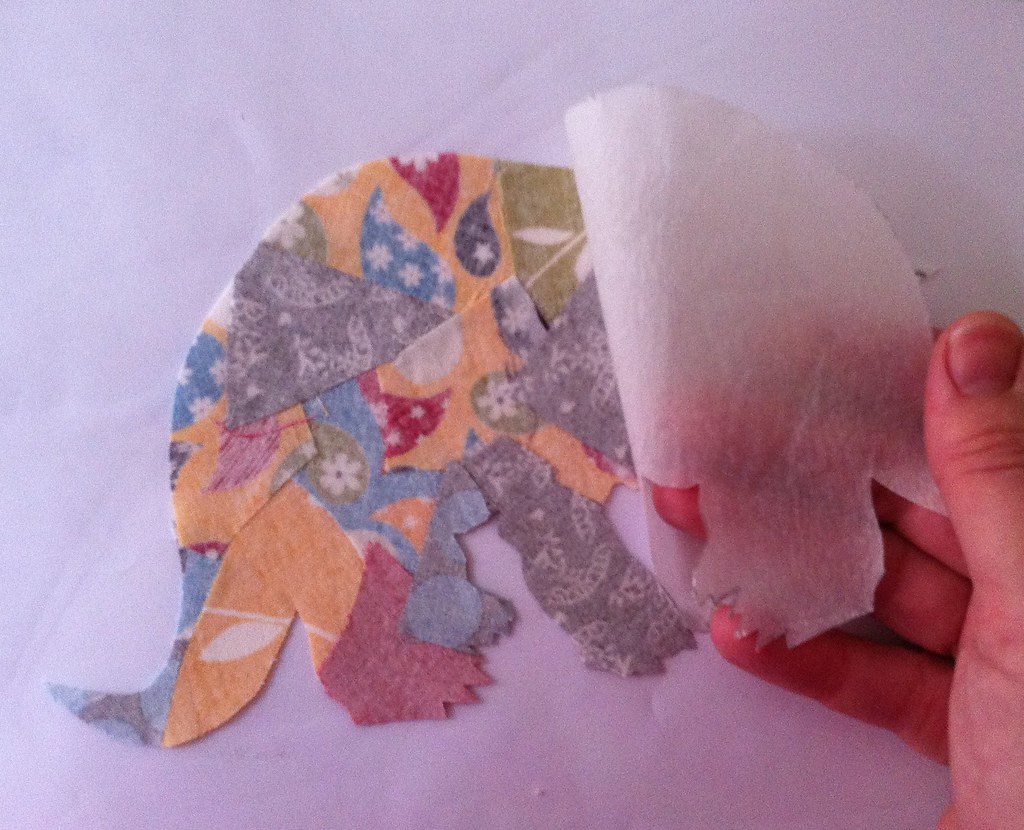
And carefully peel off the paper backing and fuse it to your background fabric, again following the product instructions. Be gentle with your scrappy shape, mine was quite fragile before I fused it to the background.
Now for the fun part!
I love ric rac but have never been able to use it in a project for my boys before. This was the perfect opportunity to squeeze a little bit in :)
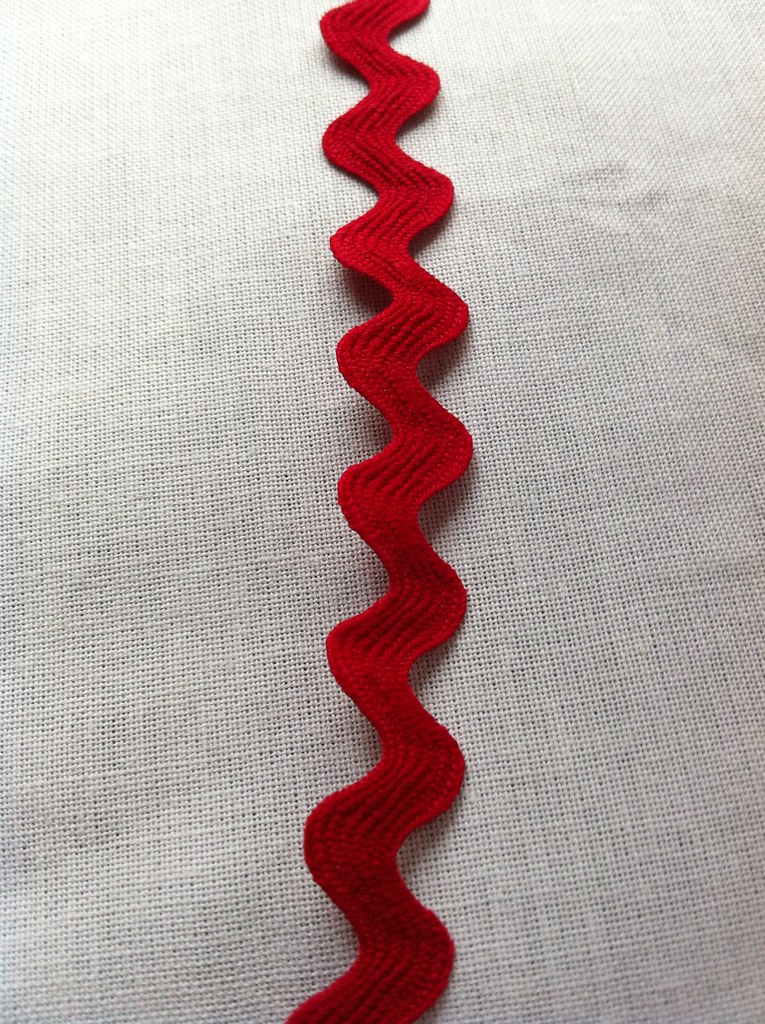
Cut a length of Ric rac a bit longer than your triceratops' frilly-hood-thing
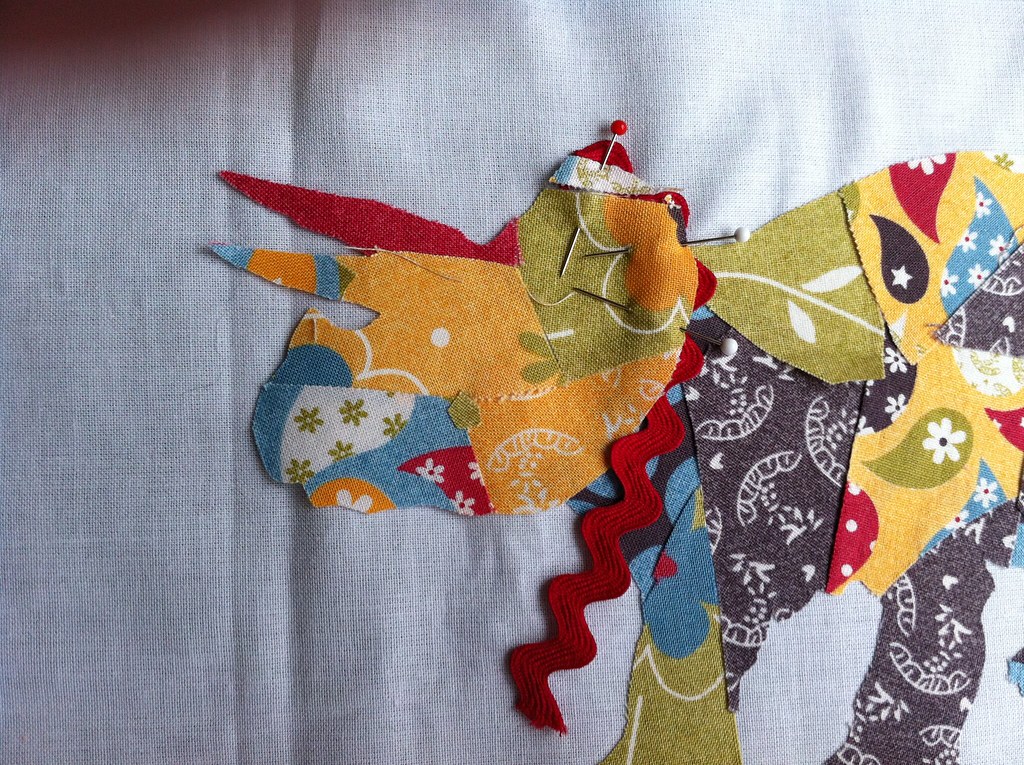
Turn each end under and pin in place.
Now you can fuse the head to the background fabric.
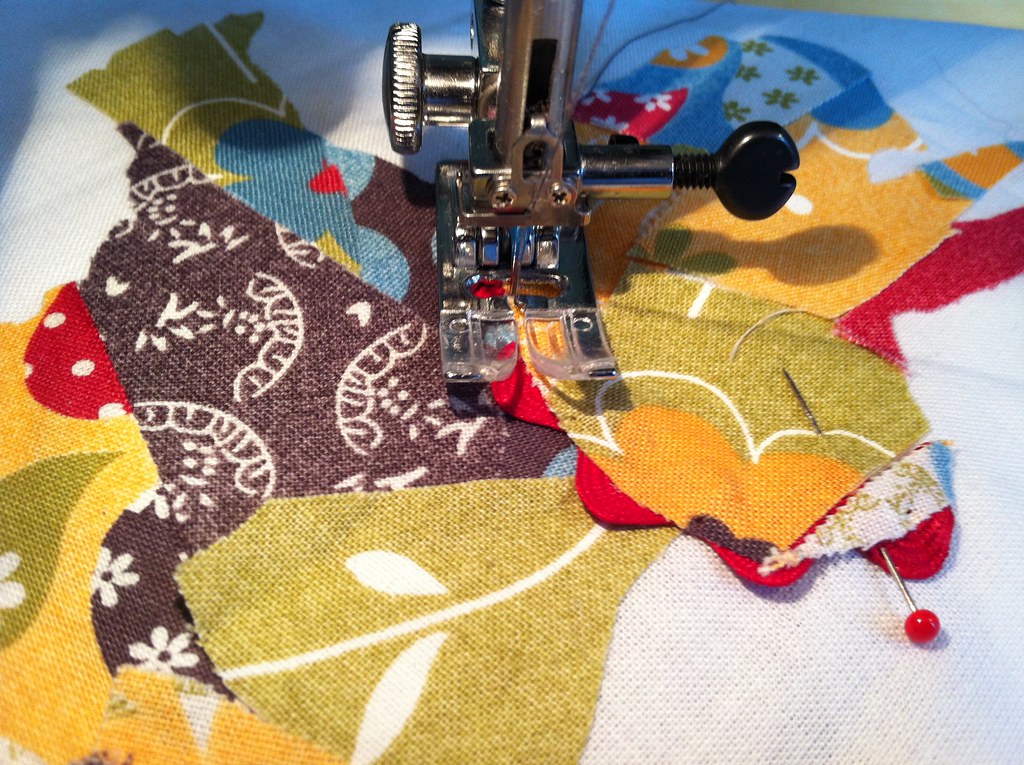
Sew around the whole shape, just inside the edge. I used dark grey thread and outlined it twice, to try to define the details of the head, horns and legs.
Then I added a matching border, before layering and basting.
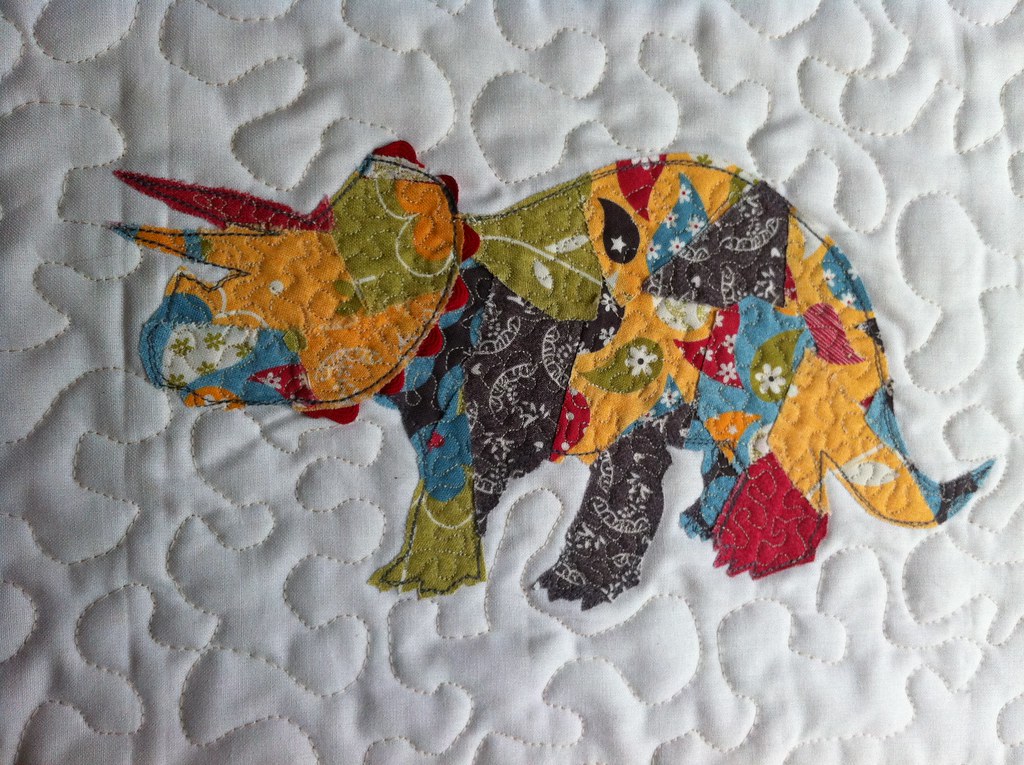
I quilted the triceratops first with a really tiny stipple. This secured any flappy bits of the scraps and gave him a bit of a pre-historic scaly armour texture :)
Then I did a larger stipple all over the background. (Please excuse my dodgy quilting, I'm getting better than I was, but I'm still learning!)
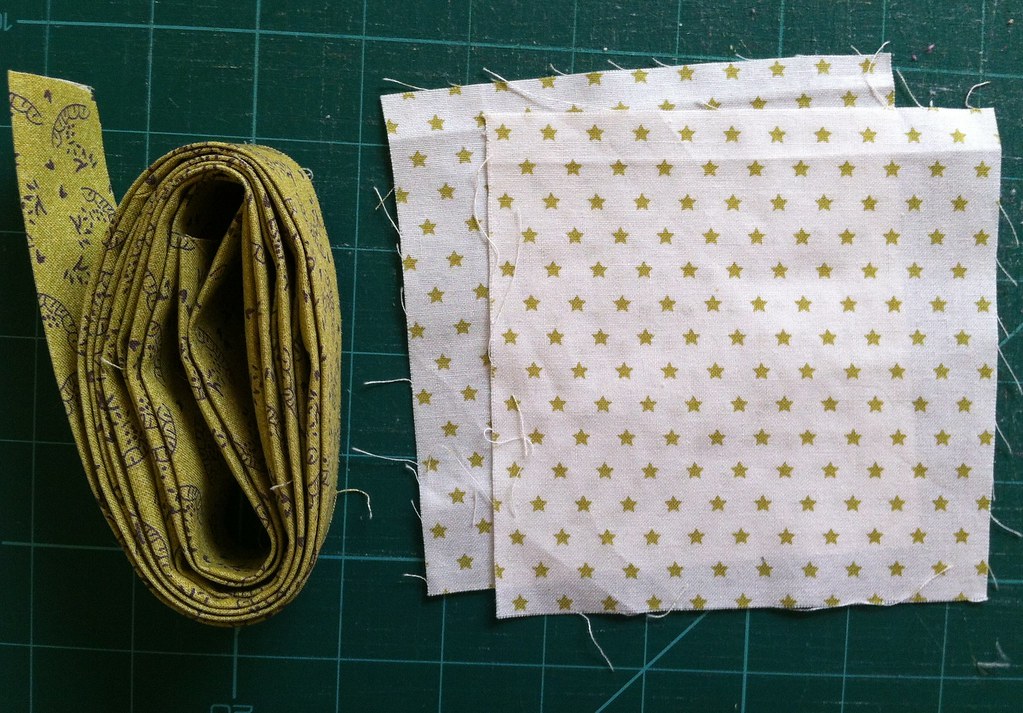
Before attaching the binding, I made hanging pockets by folding 2 squares of fabric in half diagonally (I used 5" squares but the size doesn't really matter)
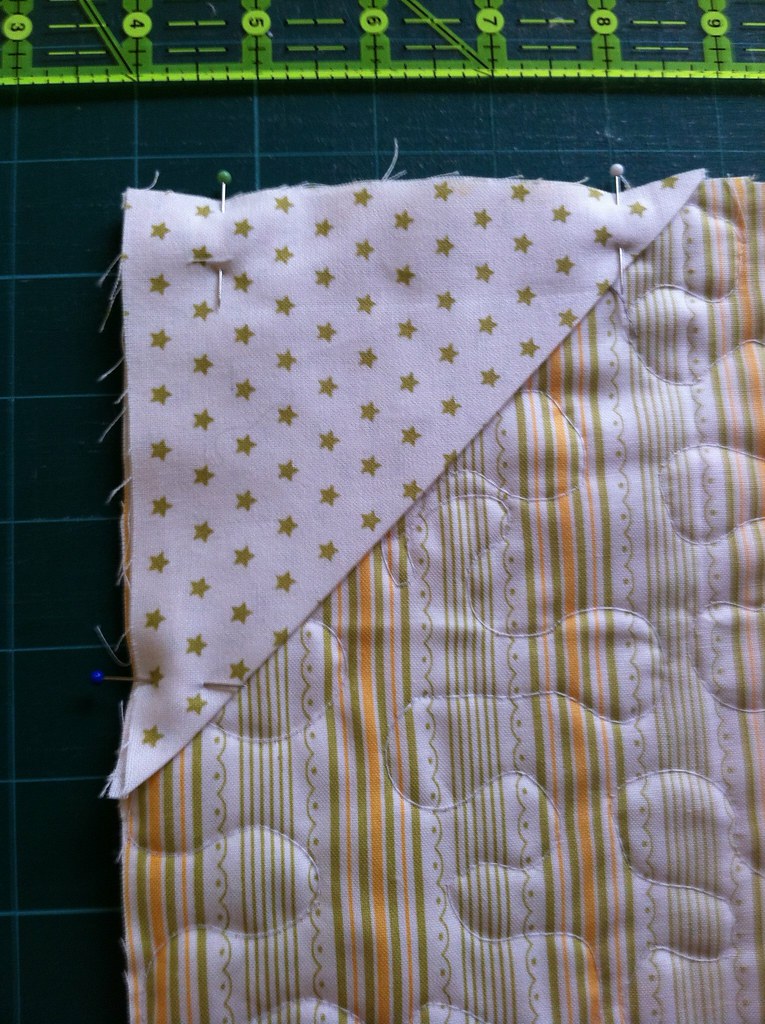
I pinned them to the top 2 corners of the quilt, and then carefully attached the binding.
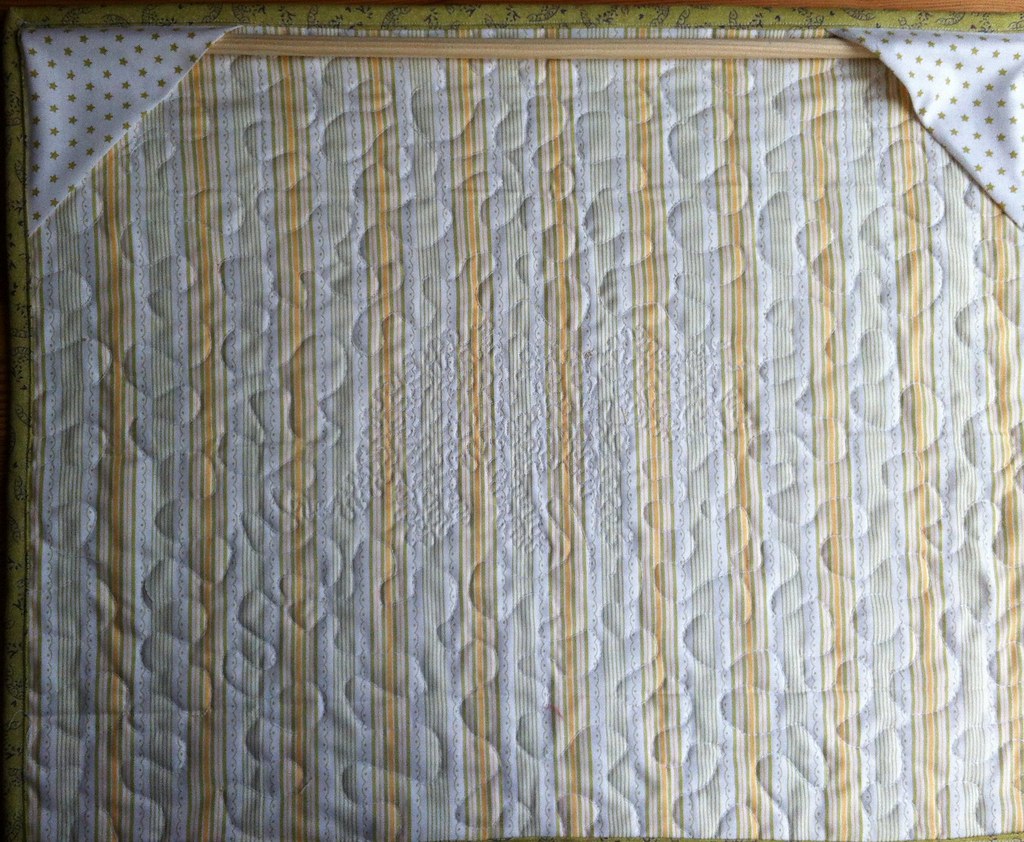
Then I cut a length of wooden doweling roughly the same size as my quilt and popped it into the triangular pockets.
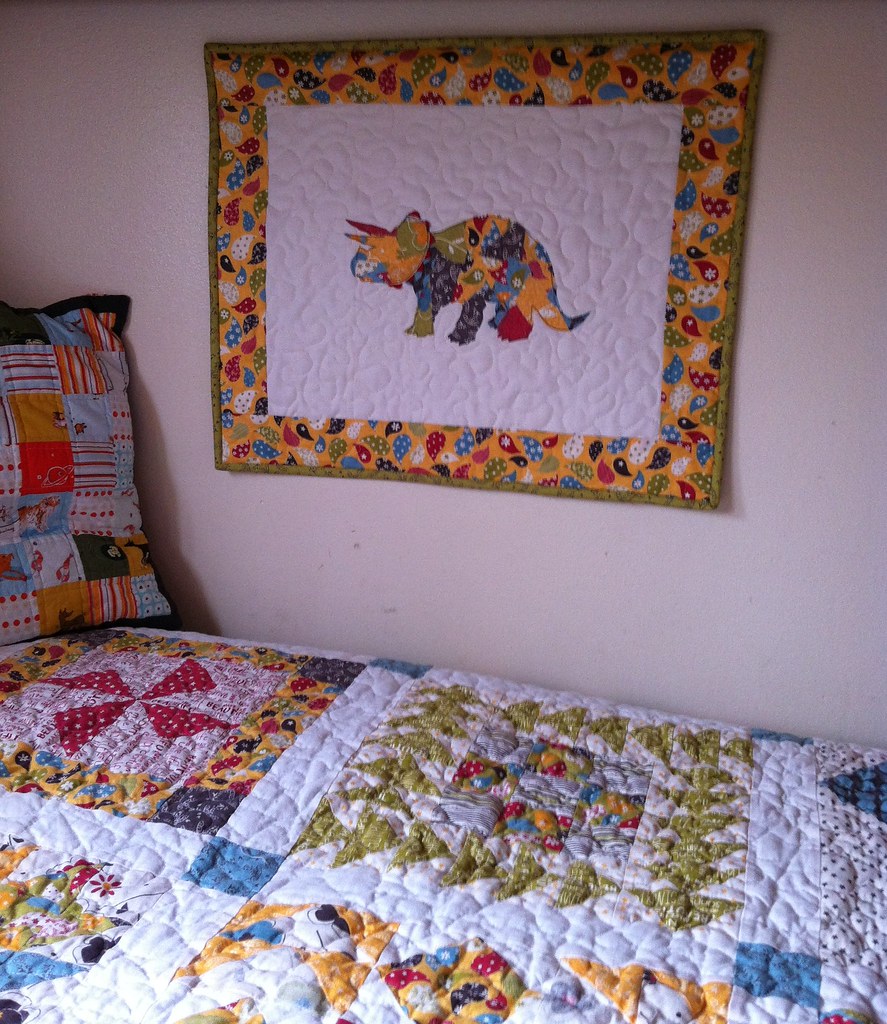
Then you hang it on the wall and enjoy the smile on dino-boy's face when he sees it :)
My oldest boy is doing a project at school about dinosaurs, and has pronounced this Triceratops anatomically correct.... Phew!
If you've made it this far, thankyou so much for reading! I hope this has shown you how easy it can be to make what looks like a complicated shape.
If you have any questions, please ask. I kind of made a lot of it up as I went along, but I'll try to help.
Thankyou so much to Jennifer for running this fantastic blog hoppping challenge. If you haven't already had a look at some of the inspiring Modern Minis to get you in the mood, you really should. There are fantastic prizes to be won!
A BIG THANKS goes out to Kimberly at the Fat Quarter Shop for generously sponsoring all five of our fabulous prizes.

The five winners will be chosen as follows:
James’ choice (Jennifer's Husband chooses his favorite)
Viewer’s choice Mug Rugs
Viewer’s choice Mini Quilts
(mug rugs and mini quilts- the viewers choose from a selection chosen by myself and three other bloggers)
Luck of the Draw (Random Number Generator chooses 2 winners)
So what are those fabulous five prizes? Hold on to your hats!

Source: fatquartershop.com via Jennifer Mathis on Pinterest
Both Viewer’s Choice Winners will receive a fat quarter bundle of the FULL LINE of Flea Market Fancy reprint by Denyse Schmidt.
Both Luck of the Draw Winners will receive a $75 gift certificate to Fat Quarter Shop
Below is the line-up for the blog-hop:
2/8: Lily's Quilts
2/9: Patchwork Notes
2/12: Freshly Pieced
2/13: From the Blue Chair & Poppy Makes
2/15: Mon Petit Lyons & Felicity Quilts
2/17: Life's Rich Pattern & Twin Fibers
2/18: Cut to Pieces & Sew Sweetness
2/19: Swim Bike Quilt
Contest Requirements:
1. Create a modern mini quilt or mug rug - only one entry per person
2. Enter your mini quilt or mug rug in the linky party at Ellison Lane Quilts on Monday, March 5.
You do NOT have to have a blog to enter. You may link a picture from your Flickr account.
3. Your entry (blog post or Flickr description) should include the size of the item
Now do I have to decide, do I make another mini to enter the competition, or do I enter this one?!
Thankyou from Fiona and RAH! from dino-boy x
What a fun mini quil - perfect for a boy! I'd say you're competition ready, can't imagine anyone else having one like this! Jxo
ReplyDeleteLove this! So cute :-)
ReplyDeleteIt's brilliant Fiona, and the tute was perfect - I would have been tempted to send that to Jennie as my self-portrait!
ReplyDeleteGreat mini Fiona! Got to love bondaweb!
ReplyDeleteOh your son must be sooooo pleased with you!
ReplyDeleteThis is such a fun make.
ReplyDeleteSo cool, and love your scrappy dino! You'll need to see if you can smuggle it out on the 23rd ;o)
ReplyDeleteSo lovely to have you join our blog hop Fiona. Honored to have you here and love your dino quilt! I have a feeling that once my little guy gets a bit older, I might need to make him one of these too. :)
ReplyDeleteWahoo! Way to go, Fi! That is awesome - I'd never thought of going really scrappy like that for a silhouette. I am inspired! Thanks for sharing (and I don't think your quilting is at all dodgy!)
ReplyDeleteSo cute and I love how it matches your son's quilt! Thanks for the tutorial!
ReplyDeleteThat is such a cute little dinosaur and a beautiful quilt.
ReplyDeleteThis is fabulous! and how great to have something for boys!!!
ReplyDeleteThis is so so cute!!
ReplyDeleteLove it!
ReplyDeleteI love this! Thanks for the tut.
ReplyDeleteI love dinosaurs; this is super cute!
ReplyDeleteWhat an adorable idea.....one of our grandsons is o into dinos!
ReplyDeleteVery cool!!
ReplyDeleteTurned out fantastic.
ReplyDeletehttp://richardquilts.blogspot.com
Stop by for my quilt givaway to guess my babys b-day and weight.
What a darling quilt! I love the scrappy dino. Fantastic!!!
ReplyDeleteThat looks awesome! I love the ric rac detail! How hard was it to do the mini stipple?
ReplyDeleteVery cute Fiona. That would be super cute as a crown as well.
ReplyDeleteThat is one cute triceratop! And it goes perfectly above the quilt. Thanks for the tute!
ReplyDeleteWhat a great project! It looked really complicated in the first photo, but now that I have seen how you did it, it looks really easy! Great tutorial!
ReplyDeleteGreat tutorial and fabulous dinosaur!
ReplyDeleteOh this is amazing Fiona - my son is completely dinasaur obsessed and has been since his 3rd birthday when he was given some beautiful Schleich models. I shall have to send you a photo of the pile of dinasaurs he has since amassed! He looks at books about them and loves watching walking with dinosaurs on youtube. When we visited the Nat. History museum over Christmas he couldn`t believe it. I shall have to make one of these for him and soon. Fabulous tutorial and fabulous mini!
ReplyDeleteIt's amazing - well done on your first blog hop feature, you're a natural!!
ReplyDeleteGreat tutorial- easy to follow directions. Thanks!
ReplyDeleteCongrats on your first blog hop! Great post and fab tutorial, thanks!
ReplyDeleteThe mini looks wonderful - I bet your son was delighted :)
Love it. The rick rack is a great idea.
ReplyDeleteLoving the dino mini - I have an almost 3yr old 'dino-boy' who would love something like this. Might just have to have a little go at something similar. Fab tute and I think your quilting looks fab, esp the tiny stippling - very effective!
ReplyDeleteGreat tutorial and the ric-rac is genius! My youngest is just entering the dino-faze so i need to relearn all the names I've forgotten from when his big brother was dino-mad. He corrected one of his teachers at school when they incorrectly identified a dino as being a carnivore when they were obviously a herbivore - I mean get it right teacher! :) little kids are so pedantic - love it!
ReplyDeleteWhat a fun idea! I love the dinosaur and the way you pieced it.
ReplyDeleteCuteness itself. My DDIL bought a jar of Dinosaurs from Toys-R-Us and tells Oli (he's 2 1/2) practically every day that if he doesn't come in for his lunch from the lounge the dinosaurs are going to eat it. It's just too cute for words. My DDIL comes from Glasgow too.
ReplyDeleteHow fun! I really enjoyed your tutorial and this project. Great idea using snips of fabric instead of one piece makes great interest for the dinosaur. Also neat use of the ric-rac. My experience has been little boys go through a dinosaur faze. My grandson is almost one and a half years old and I'm sure it won't be too long before he discovers them. hehe. Thanks for sharing a great project!
ReplyDeleteWhat a sweet little dino! I'll bet your son is in love with it!! Thanks for the great tutorial too.
ReplyDeleteAmazing, great tutorial, great blog. So happy to have found you.
ReplyDeleteHi Fiona from your newest follower. Love your little dinosaur wall hanging. so cute. Nice to meet another Scottish quilter - I'm over in Fife. Please feel free to come visit my blog.
ReplyDeleteRhianon.
aww, little boys in homes all over quiltybloggyland are goin mental at the thought of that I'm sure... lol
ReplyDeleteThat the the cutest thing ever! Thanks for sharing a great tutorial!
ReplyDeleteThis is adorable!
ReplyDeletesuch a cute little dinosaur - love the quilting and looks fabulous on the wall :)
ReplyDeleteHow special to be part of the hop - the dino looks so perfect on the wall with the bed quilt. Thanks for the visual play by play.
ReplyDeleteGreat tutorial! Lucky son!
ReplyDeleteOutstanding!! My nephew would be in heaven. :)
ReplyDeleteFun project Fiona and a great technique, I also have a nephew who would love this.
ReplyDeletethat ricrac is a touch of genius!
ReplyDeleteSo much fun, and great tutorial on the piecing of the fabrics for the dinosaur.
ReplyDelete