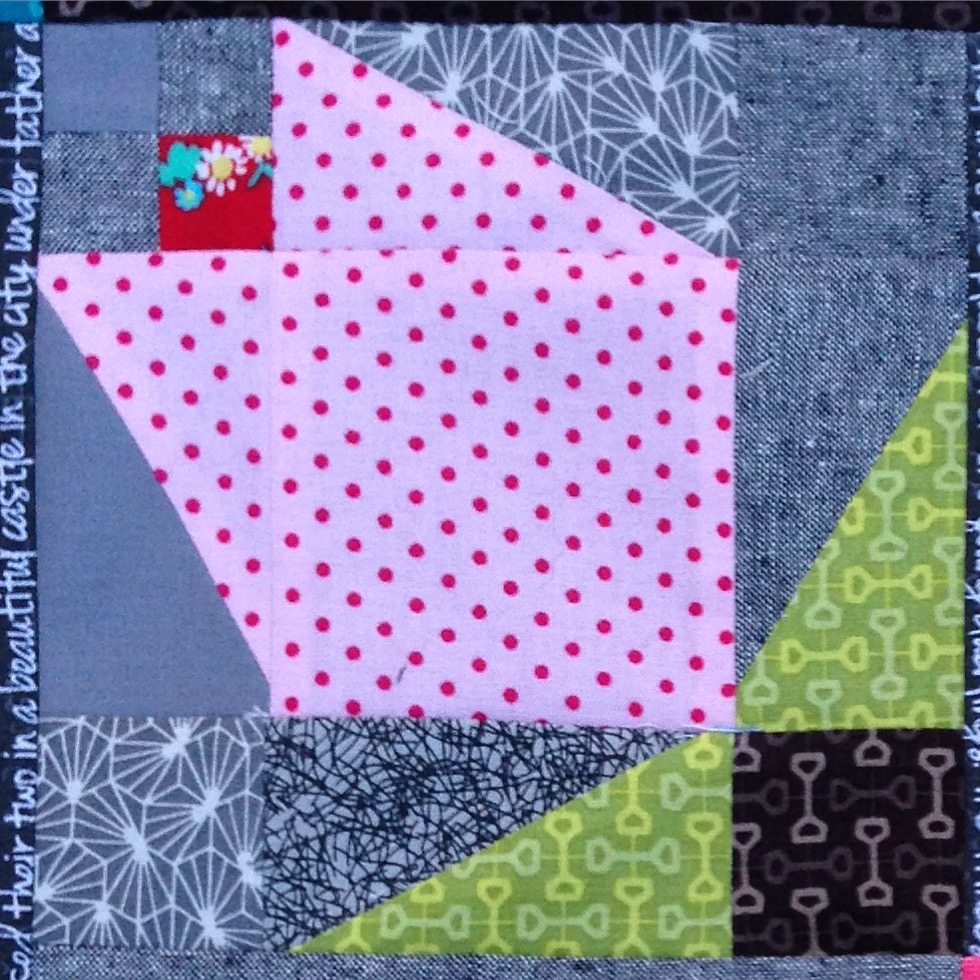
Friday, 24 May 2013

Clamshells a Tutorial

Life has been a bit bumpy around these parts lately and I decided I needed a new hand stitching project to cheer me up and help me relax. For a long time now I've been wanting to try clamshells.


I posted the picture above on Instagram and Flickr and a lot of people said they wanted to try Clamshells too, so I thought I'd whip up a little tutorial so you can :)

You will need:
Squares of fabric
a strip of fabric approx 8" wide x however long you want your finished project to be (mine is about 20" long)
Some squared paper
Cardboard
Pencil
Kitchen foil
Plantpot/mug/bowl/something round to draw around I used a plantpot that is 4" in diameter
Needle, thread, scissors, iron

To make my Clamshells I am using a 5" charm pack. I chose Marmalade by Bonnie and Camille for Moda because it is summery and cheerful, but you could use scraps if you like.


Making a clamshell template is a lot easier than you think. Place your round object on the squared paper and try to centre it on the squares. Draw round it and then mark 12 o'clock, 3 o'clock, 6 o'clock and 9 o'clock. Use your markings to draw a circle the intersects at 3 o'clock and 6 o'clock, and another that intersects at 6 o'clock and 9 o'clock. This gives you your clamshell template without seam allowances


Cut your template out and transfer it to cardboard.


Place your cardboard template on a charm square and draw round it using pencil (or whatever you prefer). You can mark your seam allowances if you wish, but I just eyeballed a 1/2" seam allowance and cut it out.


Take a piece of kitchen foil that is slightly larger than the cut clamshell, and place the cut clamshell on top, followed by the cardboard template. Carefully use the foil to fold the top curved edge of the clamshell around the cardboard template. Press with a hot iron. Allow to cool and gently remove the foil. You should have a lovely smoothly curved seam. The clamshell is now ready to be appliqued.


For the top row of clamshells I placed 4 clams along my fabric strip, making sure they were all level, with the sides just touching but not overlapping. (Sorry I hadn't started taking pictures at this point!) Pin them to the background strip and applique the top curved edge only. I hand stitched using small invisible(ish!) stitches, but you could topstitch if you prefer.


Once your top row is stitched in place you can begin layering the clamshells one row at a time, pinning and stitching the same way as the first row. You could go as big as you like! I'm planning an 18" cushion. When you layer each clam make sure the 12 o'clock position is lining up with the meeting point of the 2 clamshells directly above it.

Here is how it looks from the back to give you a better idea

Hope all that makes sense. If there are any questions, please give me a shout.

Happy Weekend!
Fiona x

Monday, 20 May 2013

Simple Medallion Quilt in Fat Quarterly


So I'm a bit late posting this, but I'm very excited to tell you that I have a quilt featuring in the latest issue of Fat Quarterly which has a traditional modern theme. I absolutely love taking a traditional block and using modern fabric to make something beautiful.


For a long time I've wanted to make  a Medallion quilt, and decided that a simple medallion style quilt that was quick and easy to make would be perfect. I love the Bearpaw block and based the quilt on it, using some supersize bearpaws and simple piecing.


Art Gallery Fabrics kindly sent me some of their gorgeous Carnaby Street fabric and it makes the softest most strokable quilt ever!


The latest edition of Fat Quarterly is packed with some gorgeous projects and I can't wait to try out some of the beautiful patterns. You can buy a copy here if you're interested too :)

Fiona x


Friday, 3 May 2013

Jammies!

Thanks for all the lovely comments yesterday. I really enjoyed my day of happy random sewing :)


 I'm a bit more focused today and have popped in to show you the Jammies I made this morning :)


Unpicking my old PJs worked a treat, and I was able to make a couple of changes that made them even better for me. I'm pretty tall at 5' 10" and shop-bought PJ bottoms are just never long enough, so I added about 4" to the length and made the bottom of the legs slightly wider.


I even remembered to put a little tag in to show me which is the back :)


I'm planning to wear these until I have to leave the house to pick the kids up from school, and I think I might just make myself another pair. They were pretty quick to make. I think I might clean that mirror first though ;)

Just in case anyone is interested the fabric is by Heather Ross and is from her Crafty Chloe range.

Happy Friday!
Fiona x

Thursday, 2 May 2013

A cunning plan...

I've been flat out writing an assignment that was due in today. I submitted it very early this morning and decided to reward myself with a day of sewing anything I wanted.


This morning I hatched a cunning plan. I decided to unpick a pair of my favourite PJs and use the pieces to make myself some lovely new ones using some of the Heather Ross Clothespin People print I've been saving for a while.

   
The unpicking went well and I realised that I didn't need both legs. Just one leg is enough to use as a pattern.


One thing led to another and before I knew it, I had made myself a Noodlehead divided basket with the spare leg and a half yard of fabric and other bits and bobs I had in my stash.


I'm ridiculously happy with my new basket! It's a fantastic pattern and I really love the Pyjama fabric. It's lovely and soft and worn. Making something new and pretty out of something old makes me happy, and I still have the other leg and a pair of PJs to make :)

I think I might be having a 'Me' sewing day tomorrow too :)

Happy Wednesday!
Fiona x

Monday, 29 April 2013

The Single Girl...

A couple of years ago Katy, Nova and Megan ran a Quilt Along to make Denyse Schmidt's Single Girl Quilt. I jumped in with both feet, and made 2 cushions and a quilt top


One cushion was sent to a partner in the Pillow Talk Swap, the other belongs to my youngest boy and keeps his bum comfy while he's watching TV. The quilt top has been sitting in a bag at the bottom of my wardrobe since February 2011 because it is so big I just couldn't face basting it. 

I did come across it in November last year and told myself I really should get it finished, but it ended up back in the bag in the wardrobe.

Fast forward to last week when the lovely Emily announced that she was going to start offering a basting service! How exciting!!!! A couple of emails later and my Single Girl quilt top is going to head down to Emily's so she can work her magic and then send it back to me all ready for quilting!


I've pieced a backing and I'm getting wadding sent down to Emily too and I can't wait to finally get this thing basted! It's so exciting when bloggy pals think up brilliant schemes to make life easier! :)
Happy Monday
Fiona x

Tuesday, 23 April 2013

Scrappy Trippin'


Last week I was seized by the urge to start a Scrappy Trip quilt using some American Jane jelly roll strips that the lovely Laura sent me a while back. I had been resisting the Scrappy-Trip-Along Fever that gripped Instagram and Flickr a wee while back, and I was actually in the middle of doing something else when I came upon the jelly roll strips. Anyway, one thing lead to another and before I knew it I had 4 scrappy trip blocks that I made using this tutorial.


Once I got a grip of myself again I realised that a whole big quilt using this pattern in this fabric just isn't for me, and I decided to make a baby quilt instead. I added a few borders and some straight line quilting, and then just a teeny wee touch of hand quilting in green perle to the white borders.


I used some of the remaining jelly roll strips to make a scrappy binding which I stitched down by hand one evening and voila! A very bright and happy baby quilt :)


I've popped the quilt into my little Etsy shop, before I decide that I need to have another baby just so I can use this quilt. If you're interested, you can find it here.

Fabric used is American Jane's ABC123 for Moda plus some scraps
Backing is a lovely American Jane print from Snippets that the lovely Gertie sent me :)
Wadding is Warm and Natural (NOT the easiest to hand quilt!)
The quilt measures approx 39" x 39"

Happy Tuesday!

Fiona x


Saturday, 20 April 2013

Well Hello


I'm just popping in to say Hello as I seem to be slowly sinking under a pile of fabric, half-finished projects and coursework and it feels like ages since I wrote a blog post!

My course is going really well and I'm managing to juggle kids, work, coursework and fit in a little bit of sewing, but blogging seems to be a step to far a lot of the time. But I've just arrived home from work to an empty house (well almost, Murphy was the welcoming committee) and thought I'd pop in here and show a little of what I've been up to :)


For years I've been wanting to make this quilt from the Moda Bake Shop. I just think it's brilliant! Recently the lovely Cindy from Fluffy Sheep Quilting asked some friends to help her out and make some little quilts to help show off the lovely fabric she stocks in her shop. I decided that it was the perfect chance to make that baby quilt.


While I was waiting for the fabric I'd chosen to come into stock I just couldn't wait to make that quilt so I made a girlie version using my very precious charm pack of Wonderland by Momo for Moda. The lovely Emily had tipped me off about where I could find some Hopdot from Heather Bailey's Nicey Jane and it arrived when I was thinking about background fabric. I think it's a match made in Heaven!


The prairie points are really easy to make and I think they just make this quilt so lively and fun! This quilt is now listed for sale in my Etsy shop in case anybody is interested :)


The fabric from Cindy has now arrived, and I think I will have a wee play about with that until my noise-makers return from a family party :)


Happy weekend!
Fiona x